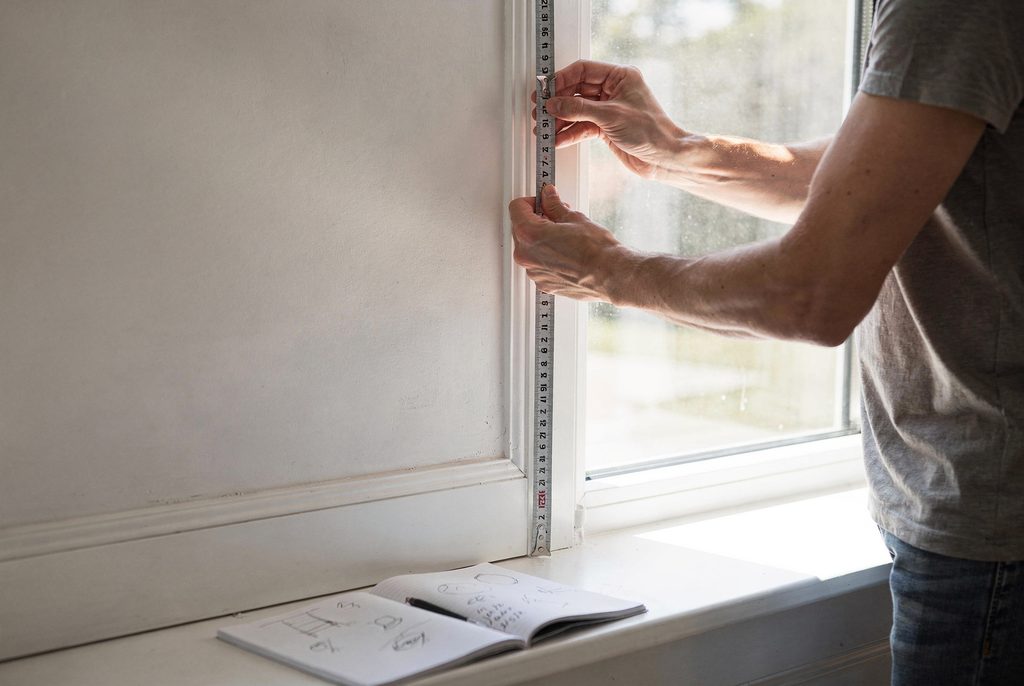
Category: Window Education

How Much Does Window Replacement Cost in Kansas City?

How Much Does Window Replacement Cost in Kansas City?

Window replacement cost in Kansas City runs about $700 to $1,400 per installed window, per Angi. See costs by style, local cost drivers, and how to get a quote.
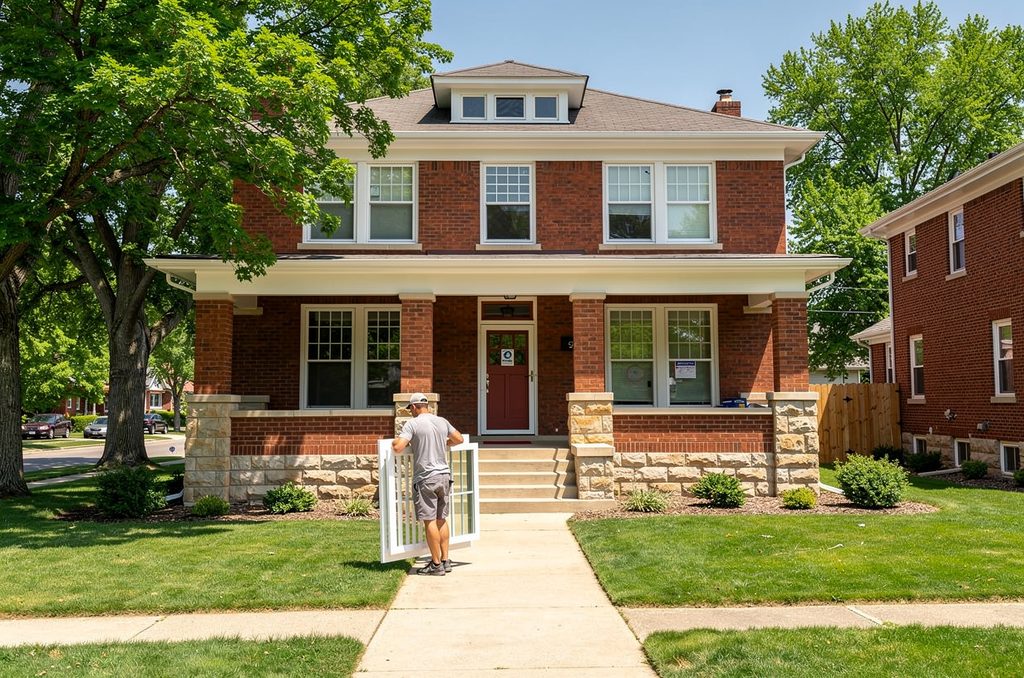

Window replacement in Kansas City typically runs $700 to $1,400 per installed window, with an average project costing about $4,888 and most jobs landing between $2,504 and $7,528, according to Angi's Kansas City cost data. For a typical Kansas City home with 8 to 15 windows, that same source puts the total at roughly $5,600 for a basic replacement and up to $21,000 for high-end custom work. Where your own project lands depends on how many windows you're replacing, the styles you pick, the glass package, and how your home is built.

One thing to know up front: those numbers are published market benchmarks, not a Zen Windows price list. Because our local Kansas City team custom-builds and prices every project to fit the specific home, we don't print a one-size-fits-all local price sheet here. Instead, we'll walk you through what the market data says, explain what pushes a Kansas City quote up or down, and show you how to get a ballpark price for your home in under 30 seconds with our instant pricing estimator. That tool lets you check whether a project fits your budget right away, without scheduling a home visit or taking a sales call.

Average window replacement costs in Kansas City

Published cost averages vary quite a bit depending on whether a source tracks local projects, national averages, or customer surveys. Here's how the main ones stack up side by side.

SourceWhat it measuresPer windowWhole project
AngiKansas City metro$700 to $1,400 installed$4,888 average, $2,504 to $7,528 typical
ModernizeNational homeowner projects$1,047 average, $700 to $1,400 typicalNot stated
This Old House2026 national survey of 1,000 window customers$517 average ($472 for vinyl)$7,183 average

As the table shows, per-window averages span from $517 in national customer surveys to over $1,000 in broader project trackers, largely because of how the windows are installed. HomeAdvisor puts labor at $100 to $300 per window for a retrofit installation (which slips the new custom window into your existing sound frame to keep disruption and labor costs down) versus $150 to $800 per window for a full-frame replacement (which tears out damaged framing down to the studs). Two quotes for the “same” ten windows can easily sit thousands of dollars apart if one contractor prices a retrofit and the other prices a full-frame tear-out. When you compare quotes, always make sure they cover the same installation method, glass package, and warranty.

Window replacement cost by style

Window style is one of the biggest price drivers because moving parts, hardware, and structural framing change how a window is built and installed. The table below uses Modernize's published national ranges and Angi data so you can see how different styles compare. Keep in mind these are national benchmarks rather than local Zen Windows quotes.

Window stylePublished national range per windowSourceWhat moves the price
Double-hung$500 to $1,400ModernizeSize and glass package
Sliding$600 to $1,500ModernizeSize and glass package
Casement$500 to $1,800ModernizeCrank hardware
Awning$477 to $1,107ModernizeSize and glass package
Picture$600 to $1,900ModernizeGlass area
Bay$1,700 to $3,700ModernizePriced as one assembly, plus structural work
Bow$1,810 to $3,859ModernizePriced as one assembly, plus structural work
Garden$1,200 to $3,650AngiSize and structural work
Round top and special shapePriced per projectOur national guideBuilt to order, with a lead time of at least 8 weeks

Standard operating windows like double-hung, sliding, and awning styles stay toward the lower end of the spectrum, while multi-pane bay and bow units cost more because they project outward as one large assembly and often need structural support. Casements add crank hardware that pulls the sash tight against the frame to block drafts, while picture windows have no moving parts at all, putting the budget entirely into expansive, unobstructed glass.

Want to see the installed starting ranges Zen Windows publishes by style? Check out our national guide, How Much Does Window Replacement Cost in 2026?, which breaks down those numbers and what's included in them. From there, our local estimator can narrow things down for your Kansas City home.

What drives window replacement cost in Kansas City

Every window quote comes down to window count, style, glass, and home construction, but living in the Kansas City metro brings a few local twists of its own.

Freeze-thaw winters, humid summers, and hail

Kansas City windows take a beating from spring hail, sticky summers, and icy winters, often in the same calendar year. According to the National Weather Service, Kansas City's average last spring freeze hits on April 8 and the first fall freeze arrives October 28. Between fall and spring, temperatures bounce above and below freezing over and over. That expansion and contraction puts heavy stress on frames and glass seals, eventually letting insulating gas escape and causing panes to fog up. Our post on how seasonal changes affect windows and doors in Kansas City shows what that wear looks like up close.

Our weather also shapes the glass package you need. The U.S. Department of Energy notes that heat gain and heat loss through windows account for 25% to 30% of residential heating and cooling energy use, and recommends pairing a low U-factor with a low solar heat gain coefficient (SHGC) in places with both cold winters and hot summers. That describes Kansas City to a tee. Jackson County sits in the Department of Energy's mixed-humid climate zone 4A: a low U-factor helps trap your furnace heat inside during January, while a low SHGC blocks harsh solar heat from baking your living room in July.

With Zen Windows, energy-efficient glass comes standard, so homeowners don't pay an upcharge just to get weather-appropriate insulation that helps tame utility bills and drafts. Your glass cost only goes up if you choose optional upgrades, like triple-pane glass for maximum thermal performance or specialized acoustic glass that quiets down busy street and highway noise.

Hail affects your budget differently. It's less about what options you pick upfront and more about who pays if a storm shatters a pane, which we cover in the insurance FAQ below.

Older homes and historic districts

If you own an older home, its age changes how installers approach the job. Tearing out heavy original wood windows takes more time and care than removing old vinyl units. Settled framing often leaves openings out of square or in odd sizes, and working against brick or stone exteriors takes extra precision to seal cleanly. Any of those details can nudge installation costs higher than on a newer suburban home.

That said, newer homes aren't immune to window expenses. Builder-grade windows are typically meant to last only about 7 to 10 years, so homeowners in houses built in the 2010s are often surprised to find failed seals or drafty sashes already.

If your home sits in a designated historic district, you'll also need to factor in city review:

  • In Kansas City, Missouri: The city's Historic Preservation Commission reviews exterior changes to local landmarks and homes in local historic districts, and must approve a Certificate of Appropriateness before a building permit is issued for exterior work.
  • In Kansas City, Kansas: Across the state line, the Unified Government's historic preservation rules require a Certificate of Appropriateness in locally designated districts whenever window dimensions change or windows are removed entirely.

For your budget and timeline, historic review can narrow which window styles, narrow frame profiles, or divided-light grids you're allowed to use, and add at least 3 to 6 weeks for approval. Our guide to historic windows in Kansas City walks through that approval process and helps you weigh when restoring original wood windows makes more sense than replacing them. (We don't do repairs or restoration ourselves, so we wrote that guide strictly to help homeowners choose the right path.)

Permits: Missouri side vs. Kansas side

Permit rules change depending on which side of State Line Road you call home.

  • Kansas City, Missouri: The city's list of building permit exempt work covers “replacement of doors and windows in existing openings where fire resistance, smoke control and opening protection are not required.” In plain English, swapping an old window for a new one in the exact same opening usually doesn't need a building permit, though the work still has to meet city zoning and building codes. If you live in a local historic district, double-check with the Historic Preservation Commission on whether you still need a Certificate of Appropriateness even when a building permit isn't required.
  • Kansas-side cities: Suburbs like Overland Park, Olathe, and Kansas City, Kansas each write their own local permit exemptions into their building codes, so don't assume KCMO's rule carries over. Always check with your local building department before work starts. Olathe posts its building permit information online, and the Unified Government lists window replacement among its permit submissions.
  • Structural and egress changes: Cutting a brand-new window opening, widening an existing frame, or enlarging a basement or bedroom window to meet emergency egress safety codes nearly always requires a permit on both sides of the metro.

When structural changes or larger openings do require a permit, HomeAdvisor estimates permit fees at $50 to $300. For a closer look at local rules and U-factor and SHGC code minimums, read our guide to Kansas City building codes for windows and doors.

Tax credits and rebates

Don't build your 2026 window budget around a federal tax break. According to the IRS, the federal Energy Efficient Home Improvement Credit isn't allowed for property placed in service after December 31, 2025. Local utility rebates also shift from year to year, so call your electric or gas company directly before counting on a rebate check for new windows.

Does replacing more windows at once lower the price?

On a per-window basis, it usually does. Every project involves one-time logistics like precise measuring, custom shipping, crew setup, and jobsite cleanup. When you replace ten or twelve windows at once, those fixed costs get spread out across the whole batch, making one- or two-window jobs the most expensive way to buy per unit.

Still, you don't have to tackle the entire house in one go. If breaking the project into phases works better for your budget, that's okay too! Just keep in mind that smaller batches carry a slightly higher per-window cost to cover those repeat trips.

Are replacement windows worth it in Kansas City?

Looking strictly at home equity, the 2025 Cost vs. Value report for the West North Central region puts an upscale, whole-house vinyl window replacement at a $22,781 job cost with $15,932 added at resale, recouping 69.9% of the cost. Keep in mind that figure tracks a full-house upscale project rather than a single window, and it only measures resale value.

What resale charts don't capture is how your house feels every day while you live in it: steadier room temperatures, fewer cold drafts by the couch, quieter bedrooms, sashes that glide open smoothly, and lower heating and cooling bills. For most homeowners we talk with, daily comfort and energy savings matter just as much as resale day.

What Zen Windows doesn't charge for

When you look at a Zen Windows quote, what you see is what you pay. Here's what we never charge homeowners for:

  • Upfront deposits. We require zero money down, and you don't pay a penny until your installation is finished. That's right! You pay nothing when you approve your quote, and nothing when we order your custom windows from the factory. Keeping your money until the job is done puts all the risk on us to make sure you're happy with the finished work.
  • Quotes. Your quote is completely free and comes with zero obligation.
  • Fake “today-only” discounts. We don't pad our list prices just to slash them with high-pressure, one-day coupons. The price on your quote is our real, everyday price.
  • Post-measure price hikes. Once our measure technician measures every opening and you confirm the order, your price is locked in. As our Kansas City window replacement page promises: “Even after getting your window sizes, your quote won't change!” That protects your budget even if an opening turns out to be an unusual custom fraction of an inch.
  • Warranty parts or labor. Our Double Limited Lifetime Warranty covers both materials and installation labor with no year cap. It pairs the manufacturer's coverage with our own labor guarantee starting on installation day, includes accidental glass breakage (so a stray baseball or lawnmower rock doesn't turn into an out-of-pocket repair bill), and transfers to the next homeowner if you sell. If anything ever needs attention, you make one call to us and our own technicians take care of it.

If you'd rather pay over time instead of all at once upon completion, we also offer several financing options to fit different budgets. Just ask your advisor which plans match your project.

How to get a Kansas City quote from photos or the instant estimator

We built our quoting process so homeowners can go from a quick ballpark to a locked-in quote without sitting through a three-hour living room sales pitch. Here's how each step works and why we do it this way:

  1. Try the instant pricing estimator. Our Kansas City estimator gives you a ballpark price in under 30 seconds with no home visit required, making it the easiest way to reality-check your budget upfront.
  2. Send in photos for an exact quote. Ready for real numbers? Request a free quote and send our local team your window count, preferred styles, rough measurements, and a few quick photos of your windows.
  3. Hop on a virtual consultation. We'll meet by video for about 45 to 60 minutes, depending on how many questions you have, and you can join from your couch or office. Only one homeowner needs to attend, so you don't have to coordinate work schedules. You'll speak with a helpful product advisor (not a pushy salesperson) and get a close look at frame cutaways, glass options, brochures, and product videos so you know what you're buying.
  4. Review your written quote. We'll send over a clear, straightforward price with no deposit and no obligation to buy.
  5. Schedule the exact measure. Once you decide to move forward, a Zen Windows measure technician visits your home at a set time to take down-to-the-fraction measurements and photos for the factory.
  6. Get your windows installed. Because every window is custom-built for your openings, manufacturing typically takes 4 to 6 weeks (or at least 8 weeks for specialty exterior paint colors and custom architectural shapes). Installation itself wraps up in anywhere from a couple of hours to a few days depending on job size; someone just needs to be home while our crew works. Along the way, we send you weekly status updates so you never have to chase us down to find out where your order stands.

Homeowners often ask why we don't come out to measure before giving a quote. Simple: we don't need exact factory measurements to price a job accurately. Your window count, styles, rough sizes, and a few photos tell our team everything needed to calculate the real cost. Exact down-to-the-eighth-inch measurements only matter when the factory builds your custom frames, so we save that visit until you're ready to order. That way, you get a firm price without giving up an evening at your kitchen table.

Our local Kansas City team works on both sides of the state line, serving homeowners in Overland Park, Olathe, Lee's Summit, Platte County, and surrounding communities. Check out the full service map on our Zen Windows Kansas City page.

Kansas City window replacement cost FAQ

How much does it cost to replace 10 windows in Kansas City?

Based on Angi's local benchmark of $700 to $1,400 per installed window, a 10-window project in Kansas City lands roughly between $7,000 and $14,000. Your style choices, glass upgrades, and home exterior determine where you fall in that span, so try our instant pricing estimator to see a ballpark tailored to your house.

Do I need a permit to replace windows in Kansas City?

In Kansas City, Missouri, swapping old windows for new ones in the same openings is exempt from a building permit, provided special fire-resistance or opening-protection rules don't apply. However, cutting new openings, enlarging frames, or adding egress windows nearly always requires a permit. Kansas-side suburbs write their own local permit rules, so always verify with your city's building department first.

Do historic district rules make window replacement more expensive?

They can. If your home sits in a designated local historic district in Kansas City, Missouri, the Historic Preservation Commission reviews exterior updates and can restrict which window styles and materials you use. Ordering custom grid patterns or narrowhistoric-style profiles can raise material costs, and the review process adds weeks to your schedule, so check your address with the city before picking a window.

Does Zen Windows require a deposit in Kansas City?

No. We never ask for a deposit, and you pay nothing until your installation is completely finished. We also have several financing options available if you prefer monthly payments.

Is there a tax credit or rebate for new windows in Kansas City in 2026?

The federal Energy Efficient Home Improvement Credit expired for windows installed after December 31, 2025, per the IRS. Local utility incentives change periodically, so check directly with your electric or gas utility before factoring a rebate into your budget.

Does homeowners insurance cover hail-damaged windows?

It depends on your coverage and deductible. Homeowners policies generally cover sudden damage from a specific storm, like hail cracking a pane, rather than gradual wear like aging seals or rotted wood. Call your insurance agent before counting on a claim.

How long does window installation take?

Active installation takes anywhere from a couple of hours to a few days, depending on your window count and styles. Before installation day, custom manufacturing usually takes 4 to 6 weeks after final measurements, or at least 8 weeks if you choose specialty exterior paint colors or custom geometric shapes.

What's the best time of year to replace windows in Kansas City?

Whenever fits your calendar best. Don't worry about waiting for mild spring or fall weather, as professional crews swap windows one opening at a time to keep outside air out. Since custom orders take 4 to 6 weeks (or longer for specialty options) to build, just pick the month you'd like your new windows in place and count backward from there.

Ready for your Kansas City number?

Published averages are helpful for early planning, but your real price comes down to your specific home. Take our instant pricing estimator for a spin to get a ballpark figure in under 30 seconds, or request a free quote directly from our local Kansas City team. There's no deposit, no obligation, and zero sales pressure. Rest assured, you won't pay a penny until the work is done.
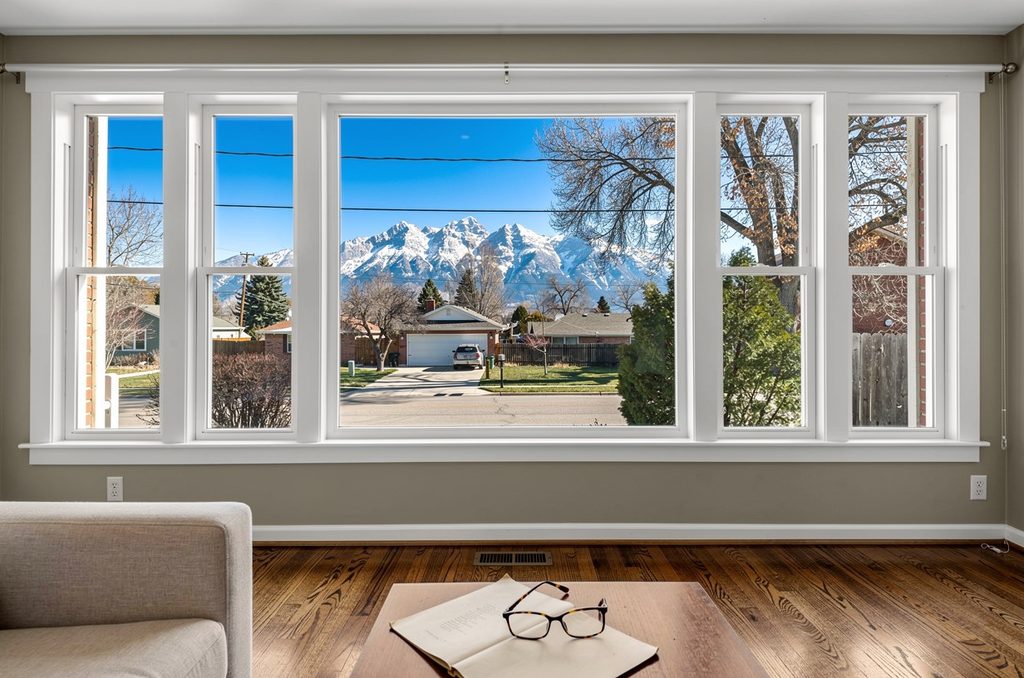
How Much Does Window Replacement Cost in Denver?

How Much Does Window Replacement Cost in Denver?

Window replacement cost in Denver: start with $800 to $1,500 per installed window from our national guide, then see prices by style and local cost drivers.

In our national window replacement cost guide, a typical installed replacement window runs $800 to $1,500 in 2026. That's a solid starting point for Denver homeowners, and it includes a custom-made vinyl frame with standard Low-E glass that keeps your rooms comfortable and blocks harsh Colorado sun from fading your floors and furniture. Before upgrades, that puts a 10-window project around $8,000 to $15,000, and a 20-window project around $16,000 to $30,000. Your actual total comes down to how many windows you're replacing, the styles and glass package you pick, and how your home is built.

Here's one thing to know right away: our Denver team prices every project individually. Rest assured, we don't keep an inflated “list price” just to mark it up and offer fake one-day discounts. Think of the numbers below as ballpark planning ranges to help you budget until we build your custom quote. Next, we'll walk through what actually moves the price along the Front Range, from high altitude and hail to historic district rules and HOA approvals.

Average replacement window costs in Denver

Published window prices in Denver are all over the map because they lump together different frame materials, quality levels, and project sizes. Here's how the main benchmarks compare side by side.

BenchmarkFigureWhat it covers
Per installed window (our national 2026 guide)$800 to $1,500Custom-made vinyl, average size, standard energy-efficient glass, standard color, professional installation
10-window home (our national 2026 guide)$8,000 to $15,000Same assumptions, before upgrades
20-window home (our national 2026 guide)$16,000 to $30,000Same assumptions, before upgrades
Denver average project (Angi)$4,777, with most projects between $2,076 and $7,489All project sizes, materials, and quality levels
Denver average per window (Angi)About $600All materials and quality levels

As the table shows, Angi's Denver window replacement cost data (updated in March 2026) looks lower on paper because it averages everything from single-pane repairs and off-the-shelf units to full custom projects. That isn't an apples-to-apples match with custom-made vinyl windows and professional installation. If custom vinyl is what you're planning for your home, the $800 to $1,500 per-window range in the top row is a much better starting point.

Window replacement cost in Denver by style

The window style you pick is one of the biggest factors in your final quote. The starting ranges below come from our national cost guide and assume custom-made vinyl, an average-size opening, standard energy-efficient glass, a standard color, and professional installation.

Window styleTypical installed costWhat to know in Denver
Double-hung$700 to $1,200Lowest starting range in our guide
Casement$900 to $1,500Can cost slightly more than a comparable double-hung
Picture$1,100 to $2,500Larger sizes sit at the upper end
Bay and bow$3,000 and upPriced as one complete assembly, not per pane
Sliding, awning, and gardenQuote-basedPriced individually by opening and configuration
Round top and special shapeQuote-basedHigher price and a lead time of at least 8 weeks

Across these styles, double-hung windows give homeowners the lowest entry point at $700 to $1,200 installed, while multi-window bay and bow assemblies start at $3,000 and up. Replacing more windows at once usually brings the per-window price down too, since our crew's measuring, delivery, setup, and cleanup get spread across more openings.

What drives window replacement cost in Denver?

The core price drivers are the same everywhere: how many windows you're replacing, the styles and glass packages you choose, and how your home is built. Living along the Front Range adds a few local twists that every homeowner should know about before comparing quotes.

High-altitude glass

Denver's elevation changes how you should compare window quotes even more than it changes the sticker price. Modern insulated glass is a sealed unit. When a window is sealed near sea level and brought up to 5,280 feet, the trapped air inside pushes harder than the thinner air outside. According to Cardinal Glass Industries' technical bulletin, that pressure difference can make the glass panes bow outward, and a big enough shift can crack the glass or pop the seal early.

Window manufacturers solve this in different ways. Many build in tiny capillary tubes that let the internal pressure equalize with Denver's air so the panes stay flat and the seals hold up. Here's the catch: that same Cardinal bulletin notes that insulating argon gas easily escapes through an open capillary tube. When you're comparing quotes, ask every installer two questions: how is the glass built for 5,280 feet, and does the U-factor on the quote reflect that exact high-altitude construction? Your advisor will gladly walk you through how our ProVia and SoftLite packages handle it, and you can read more in our guide to how Denver's altitude affects windows and doors.

UV protection

Thinner air also means stronger sun. NOAA's Climate Prediction Center adjusts UV levels upward about 6% for every kilometer of elevation, making Denver's UV exposure roughly 10% stronger than sea level on a clear day. Fresh snow on the ground reflects sunlight and pushes it even higher.

Low-E (low-emissivity) glass coatings are your best defense. They reflect heat back where it belongs and block harsh UV rays so your hardwood floors, rugs, and furniture don't fade over time. Lawrence Berkeley National Laboratory reports that Low-E coatings reduce window energy loss by as much as 40% while protecting interior finishes.

UV protection only drives up your quote when a company treats Low-E glass as a paid add-on. With us, it's built right in. Energy-efficient Low-E glass with argon gas, double-strength panes, and a stainless steel Intercept spacer system comes standard on every window we sell in Denver, helping keep rooms comfortable through winter cold snaps and bright summer afternoons. If you want extra insulation and sound control, upgrading to triple-pane glass can run as much as 30% more than double-pane.

Hail

Hail is a fact of life on the Front Range. The May 8, 2017 Denver metro hailstorm caused $2.3 billion in insured losses and still tops the Rocky Mountain Insurance Information Association's list as Colorado's costliest catastrophe.

We'll be straight with you: we don't sell hail-proof windows, and nobody can promise glass that survives every storm. Hail risk doesn't change the upfront price of our windows, though our standard double-strength glass gives you sturdier everyday panes than single-strength builder glass. Because major storm damage comes down to insurance, it's smart to check your homeowners policy and wind-and-hail deductible before storm season hits.

Energy code requirements

Denver enforces its own energy code, and it's stricter than state rules and neighboring towns. The city's Denver Energy Code amendments cap window U-factors at 0.27, or 0.25 in homes where glass makes up 15% or more of the conditioned floor area. Colorado also rolled out a statewide efficiency standard (a 0.30 maximum U-factor) for residential windows sold here starting January 1, 2026.

U-factor measures how well a window keeps heat inside your home. Lower numbers mean less heat escapes, which keeps drafty rooms warmer when winter temperatures plunge. Always ask for each window's U-factor in writing so you know it meets the code for your address. If you want even tighter thermal performance, ENERGY STAR Version 7.0 sets its Northern climate zone benchmark at a U-factor of 0.22 or lower. Our Denver energy-efficient windows page breaks down how our glass packages hit those marks.

As for permits, Denver's residential remodel guidance says you don't need a permit to replace glass or window frames unless your home is a designated landmark or sits in a historic district. Cutting new openings or adding basement egress windows does require a permit. Because the city's wording is less clear on full-unit replacements that swap both sash and frame, it's worth confirming your project scope with Denver's building department. Surrounding suburbs set their own permit rules.

Older brick and Victorian homes

Older homes take more care to fit than newer builds, especially central Denver's classic brick bungalows and Victorians. Because houses settle over the decades, we measure every opening individually and custom-make each window to fit that exact space, eliminating gaps and drafts without sloppy filler strips.

Masonry brick exteriors, upper-story openings, and full-frame tear-outs all add installation labor. If your existing wood or metal frame is still solid and square, a pocket replacement (sliding the new custom window neatly inside the existing frame) saves both labor cost and interior trim work. Angi data cited in our national guide puts older-home installation complications at $100 to $500 per window.

Historic district rules in central Denver

If you live in a designated landmark or a historic neighborhood like Curtis Park, Baker, or Potter Highlands, any exterior window work needs a certificate of appropriateness first. The city manages this through its Landmark Preservation window and door replacement review.

Denver's landmark design guidelines require homeowners to repair original “character” windows whenever possible. Replacement is only approved when a window is badly deteriorated, and the new unit has to match the original's size, profile, design, and material. That usually means replacing wood windows with wood or aluminum-clad wood.

Because we specialize in custom-made vinyl windows, we won't be the right match for every historic opening. Let us know right away if your home is in a historic district. We'd much rather give you an honest answer up front than take up an hour of your day.

HOA approvals in the suburbs

In covenant communities like Highlands Ranch, Parker, and Centennial, your HOA will likely need to sign off before installation day. The Highlands Ranch Community Association, for instance, includes replacement windows on its home improvement request form with a $40 submittal fee, and sub-associations can layer on their own rules.

That $40 fee isn't what moves your budget. Your HOA's style rules are what matter, because they often dictate exterior frame colors and grid patterns. Choosing a specialty painted exterior color raises the window price and stretches manufacturing lead time to at least 8 weeks instead of the usual 4 to 6. Check your HOA guidelines before you get your heart set on a custom color.

Home age matters in the suburbs, too. Many suburban homes start out with builder-grade windows that are only meant to last about 7 to 10 years. Once seals start fogging or frames get drafty past that mark, replacing the whole house in one project usually gives you a better per-window value than doing them piecemeal.

Rebates and tax credits

It's best not to build your window budget around tax credits or rebates right now. The federal Energy Efficient Home Improvement Credit ended for windows at the close of 2025; IRS guidance confirms the credit isn't allowed for property placed in service after December 31, 2025. Local utility incentives change from year to year, so check directly with Xcel Energy or your local provider before counting on any rebate dollars.

What we don't charge for

A few common industry markups and fees never show up on a Zen Windows quote in Denver:

  • No deposit. You pay nothing until your windows are installed and your project is complete. That's right! No money down, which means you keep control of your budget until you've seen the finished work.
  • No inflated list prices. We give you our real price right away instead of starting artificially high just to pretend we're giving you a steep discount.
  • No one-day discounts. Your quote holds steady without artificial deadlines, so you can talk things over at your own pace.
  • No charge for the quote. Getting an exact number is free and comes with zero obligation.
  • No surprise price changes. Once our measure technician verifies your openings and you confirm the order, your price is locked in.

Every window we install is also protected by our Double Limited Lifetime Warranty. You get two layers of protection: the manufacturer's warranty plus our own Zen Windows warranty covering parts, service, labor, and even accidental glass breakage. We handle warranty claims with our own technicians rather than outsourcing you to a third party, and the coverage transfers to the next homeowner if you sell. If you prefer monthly payments, we also offer several financing options with quick credit decisions to fit different budgets.

How to get a Denver quote

We give homeowners two simple ways to price their project, and neither one requires a long sales pitch at your kitchen table.

For a ballpark: the instant pricing estimator

Our Denver instant pricing estimator gives you a ballpark number in under 30 seconds with no home visit or sales call needed. It's an easy way to test the waters while you're still planning your budget.

For an exact quote: send photos

  1. Send your details. Share how many windows you want to replace, the styles you like, a few quick photos, and rough measurements with our local Denver team.
  2. Join a virtual consultation. Hop on a video call that takes about 45 minutes to an hour, depending on how many questions you have. You can join from your couch, on a lunch break, or while traveling, and only one homeowner needs to attend so you don't have to rearrange two schedules. We'll show you actual window samples, brochures, and videos right on screen so you can see how the sashes tilt, lock, and seal.
  3. Get your written quote. We'll send over a clear, itemized quote for free, with no obligation and no deposit.
  4. We take exact measurements. Ready to move forward? Our Zen Windows measure technician visits at a scheduled time to take precise measurements and photos of every opening so each custom window fits cleanly.
  5. We custom-build and install. Your windows are custom-made to order (typically in 4 to 6 weeks) and installed on a day that works for you, while we send weekly status updates so you're never left guessing.

Our advisors aren't pushy salespeople, and our consultation is a conversation, not a script. Our local Denver team serves homeowners across Highlands Ranch, Littleton, Aurora, Arvada, Boulder, Broomfield, Centennial, Parker, and Westminster. Whenever you're ready, you can request a free Denver quote here.

Denver window replacement cost FAQ

How much does it cost to replace windows in a Denver home?

Our 2026 national cost guide puts a typical installed window between $800 and $1,500 for custom-made vinyl with standard energy-efficient glass, or $8,000 to $15,000 for a 10-window home before upgrades. That's a reliable baseline for Denver homeowners, and our local team will narrow it down to the penny for your house. Every project is priced individually based on your window count, styles, glass package, and home construction.

Why won't someone measure before quoting?

We don't need to step inside your house to give you an accurate price. Your window count, styles, rough measurements, and a few photos tell our experienced team everything needed to build a real quote, sparing you a two-hour in-home sales presentation. Exact millimeter measurements happen right before ordering, when our dedicated measure technician visits your home. Rest assured, once those sizes are confirmed and you approve the order, your price is locked.

Do you require a deposit, or offer financing?

We never ask for a deposit. You don't pay a dime until your installation is finished and you're happy with the work. We also offer several low-interest financing options with straightforward monthly payments to fit different budgets, and your advisor can walk you through them during your virtual consultation.

How long does window installation take in Denver?

The actual installation takes anywhere from a couple of hours to a few days depending on how many windows we're replacing. Before installation day, your windows are custom-manufactured to fit your openings, which typically takes 4 to 6 weeks (or at least 8 weeks if you choose specialty exterior paint colors or custom architectural shapes). We just ask that an adult is home on installation day so our crew can access each room.

Do I need a permit to replace windows in Denver?

It depends on what work is being done. Denver's rules say replacing glass or window frames doesn't require a permit unless your home is a designated landmark or sits in a historic district. Cutting new window openings or installing basement egress windows does require a permit. Because city guidance is less specific about full-unit replacements, it's smart to double-check your scope with Denver's building department, or with your local city hall if you live in the suburbs.

Can I replace windows in a Denver historic district?

Sometimes, depending on the window and the neighborhood rules. You'll need a certificate of appropriateness from Denver Landmark Preservation first, and city guidelines prioritize repairing original historic windows over replacing them. When replacements are approved, they usually have to match the original material and profile, which rules out vinyl on many historic facades. Don't worry. Just share your address with us up front and we'll tell you honestly whether our custom vinyl windows are a fit before wasting your time.

Are there rebates or tax credits for replacement windows in Denver?

The federal tax credit for replacement windows expired for any units installed after December 31, 2025. Local utility rebates shift from year to year, so check directly with your utility provider to see if anything is currently active. We recommend planning your budget around the project price itself and treating any utility rebate as a nice bonus.

Is it cheaper to replace all my windows at once?

On a per-window basis, yes, it usually saves money because measuring, delivery, setup, and cleanup happen in one trip across more openings. If your budget or timeline only calls for replacing a few problem windows right now, that's okay too! We'll price out whatever makes sense for your home without pushing you into a whole-house project.

Ready for your Denver number?

Zen Windows has been helping homeowners replace their windows without the sales hassle since 1998, earning a 4.8+ average review rating across our markets and plenty of repeat customers along the way. Try our instant pricing estimator for a 30-second ballpark, or send us your photos for a free quote. You'll get straightforward pricing with no deposit, no pressure, and no home visit required.

How to Measure for Replacement Windows: Your 3-Step Guide

How to Measure for Replacement Windows: Your 3-Step Guide

How do you measure for replacement windows? Measure width and height in three places, keep the smallest, note the style. Printable table, photo checklist, and common mistakes.


How do you measure for replacement windows? Measure the width of the opening in three places (top, middle, bottom) from the inside face of one side jamb to the other. Then measure the height in three places (left, center, right) from the top of the sill to the underside of the head jamb. Write down the smallest width and the smallest height, in that order, and note the window style (double-hung, casement, sliding, picture, and so on). That's the whole method, and the three steps below walk you through it window by window.

One thing before you grab a tape measure: if you're measuring to get a replacement window quote from us, rough numbers to the nearest inch are plenty. Our online quote process is built around your photos, window count, styles, and approximate sizes so you can get clear pricing from home without sitting through an in-house sales pitch. Rest assured, a Zen Windows measure technician takes the exact measurements before we order anything. Don't worry about being perfect. Being close is enough to get an accurate price.

What you'll need

  • A steel tape measure. It stays stiff and straight across a wide opening, which a cloth or flexible tape won't.
  • Pencil and paper, or your phone's notes app. This Old House suggests starting a fresh page per room with each window labeled by location and type, like “Kitchen, left double-hung.”
  • A step stool or ladder for tall windows and anything above a kitchen counter.
  • A helper if you have large picture windows or sliders. One person holds the tape hook while the other reads the number.
  • Your phone camera for the photo checklist further down.

You don't need a level, an angle finder, or a calculator to get a quote.

Step 1: Measure the width

Stand inside your house and open the window if it opens. Hook your tape on the inside face of one side jamb (the vertical boards that form the sides of the main frame) and run it straight across to the inside face of the opposite jamb. Take the reading at three spots:

  1. Near the top, just under the head jamb.
  2. At the middle, roughly where the two sashes meet on a double-hung window.
  3. Near the bottom, just above the sill.

Circle the smallest of the three. That's your width. Old frames are rarely perfectly parallel, and the narrowest point is the gap your new window actually has to slide into. That's why Andersen's measuring guide and nearly every manufacturer worksheet tell you to use the smallest number.

Always measure wood to wood (or vinyl to vinyl). Don't hook the tape on the interior decorative trim, the thin parting stop, the weatherstripping, or the lock hardware. Marvin's insert window instructions are clear on this: width goes from main frame surface to main frame surface, never from stops or hardware. Measuring to a stop or trim adds that extra thickness to your number and leads to an oversized window that won't fit the opening.

Step 2: Measure the height

Now run the tape vertically. Start at the top of the sill (the sloped board at the bottom of the frame that the window sash rests on when closed) and measure up to the underside of the top head jamb. Don't measure from the flat shelf sticking out into your room. That's the stool, which is interior trim rather than part of the window frame. Take three readings:

  1. Left side, close to the jamb.
  2. Center of the opening.
  3. Right side, close to the jamb.

Circle the smallest number. If your sill is sloped, hook your tape at the highest point of the slope where the inside of the window meets it, and measure straight up from there.

Step 3: Note the style, then write it as width by height

Next to each measurement, write down the window style: double-hung (two sashes that slide up and down), sliding (glides side to side), casement (cranks outward for full top-to-bottom ventilation), picture (a fixed pane for clear views and daylight), awning (hinged at the top to let air in even during a light rain), bay, bow, or a special shape. Matching the style to how you use each room helps us build an accurate quote, since style is one of the main factors that drives price alongside window count, glass package, and how your home is built.

Next, write the final dimensions with width first, height second. A window that's 35 inches wide and 59 inches tall is written 35 x 59, never 59 x 35. Manufacturer order forms always put width before height, and replacement window measurements follow this order across the industry, so sticking to it prevents costly mix-ups. If you only remember one rule from this guide, make it this one.

Optional checks: depth and square

You don't need these two measurements for a quote, and if you skip them, that's okay too! They're simply helpful if you want to see whether your existing frames can take a standard pocket (insert) replacement. Pocket replacements slide right into your current frame without tearing up your interior trim or exterior siding.

  • Depth. With the window open, measure the flat surface of the sill between the inside stop and the outside stop. This Old House notes that a replacement window needs at least 3 1/4 inches of depth to sit securely in the frame. Most homes have plenty of room, and shallow frames usually only show up in modular or mobile homes.
  • Square. Measure diagonally from corner to corner both ways. Andersen's rule is that diagonals within 1/8 inch of each other mean the opening is square, while This Old House allows up to 1/4 inch. If a frame is badly out of square or has wood rot, you'll likely need a full-frame replacement instead of an insert. No worries! We can help you sort that out during your virtual consultation rather than leaving you to figure it out yourself.

Printable measurement table for the whole house

Many homeowners replace windows across the whole house at once, and keeping your numbers on a single sheet prevents mix-ups from room to room. Print your own table or set up a quick spreadsheet with a row for each window. Make sure you measure every window separately, even the ones that look identical side by side. House walls settle and shift over time, so two matching windows in the same room often have slightly different measurements.

Room / locationStyleWidth: topWidth: middleWidth: bottomHeight: leftHeight: centerHeight: rightFinal (W x H)Notes
Example: Kitchen, over sinkDouble-hung35 1/435 1/835 1/459 1/259 3/859 1/235 1/8 x 59 3/8Faces west, condensation between panes


Use the Notes column to share helpful details about each window: which direction it faces, whether it sticks or won't lock, whether the glass is foggy, or if it's in a bedroom or bathroom (so we can plan for fire-escape rules or privacy glass). Also mention if you have a busy street or highway outside, since we offer glass packages that help quiet down outside noise. A quick floor plan sketch with each window numbered helps us match everything up, too.

Photo checklist for a Zen Windows quote

Photos tell our local advisors things a tape measure can't: how your home is built, what the exterior finish looks like, how high the windows sit, and whether there's anything unusual about the trim or the opening. Along with your window count, styles, and rough sizes, we use these photos to price your project accurately without setting foot in your home. Here's what to shoot:

  1. Each window from inside, standing back far enough to show the whole unit and the trim around it, with blinds and curtains open.
  2. Each window from outside, or at least each side of the house. We look at siding, brick or stucco, exterior trim, and story height. A second-story window on a steep lot takes a different setup to install than one at ground level.
  3. A wide shot of each side of the house (front, back, both sides) so we can count the windows and match them to your table.
  4. Any problem areas: rot on the sill, peeling paint, fogged glass, gaps, or water stains on the drywall below.
  5. Anything unusual: a bay or bow window, an arched or round top, two windows joined together in one frame, a kitchen garden window, or a window that's tough to reach from outside.
  6. Doors, if you're replacing those too. Snap photos of your entry, patio, or sliding doors both open and closed, inside and out.

Daylight shots work best. Phone photos are totally fine; nobody's grading your camera work. Upload your photos through our quote form and paste your table into the project details field. From there, your local team will set up a 45-to-60-minute virtual consultation where you'll see the products, walk through your options, and get your questions answered. There's no home visit, no obligation, and no deposit.

Common measuring mistakes

  • Measuring the trim instead of the frame. Trim and stop moldings add extra inches to your reading. Hook your tape measure right against the inside of the jamb (the main frame).
  • Taking one reading instead of three. Older frames settle and shift. A window frame might be narrower at the bottom than at the top, and your new window has to fit through the narrowest spot.
  • Using the largest number. Always record the smallest width and the smallest height. An installer can easily shim and seal a window with a tiny bit of wiggle room, but a window that's too big simply won't fit.
  • Writing height before width. Window pros and factories always list width x height. Label your columns clearly so nothing gets flipped.
  • Rounding up. If you round your numbers at all, round down to the nearest 1/8 inch. For a Zen Windows quote, rounding to the nearest inch is plenty.
  • Starting the height from the interior ledge. That flat wooden shelf inside your room is the stool. Push your tape past it to the sloped outer frame piece, which is the true sill, and measure from there.
  • Assuming look-alike windows are the exact same size. Measure every single opening. House settling, past repairs, and original builder quirks all add up.
  • Measuring from outside. Every reliable guide, from Andersen's to This Old House's, has you measure from inside the home, right between the jambs.
  • Measuring a bay or bow as one big opening. Each section is actually its own window. Measure the center panel first, then each side panel, recording the width and height for each one.
  • Subtracting space for wiggle room yourself. Manufacturers automatically build installation clearance into insert windows (Marvin, for example, makes its inserts 3/8 inch narrower and 1/4 inch shorter than the opening size you give them). Write down the actual opening size and let the pros handle the deductions.

Why rough measurements are enough for a Zen Windows quote

Homeowners sometimes ask why we don't send someone out to measure before giving a quote. The honest answer is that you don't need exact measurements to get an accurate price. Window replacement costs come down to how many windows you need, the styles, the glass package, and how your home is built. Your photos and rough sizes give us all of that. We don't need to sit in your living room to give you a real number, and you don't have to give up an afternoon for a sales pitch.

Once you accept your quote, we schedule a visit from a Zen Windows measure technician at a time that works for you. The technician measures every window and door in your project down to the fraction of an inch and takes detailed photos so the factory builds your replacements to fit right. Rest assured, your quoted price won't change after this visit. That's right! The number on your quote is the exact number you pay, and you don't pay a dime until installation is complete. It's a quick measuring appointment, not a second sales pitch, and it's the only visit we need before placing your order. Our process page walks through each step, and our window replacement cost guide breaks down the pricing factors in more detail.

Exact factory numbers matter because custom replacement windows are made to order. Norm Abram of This Old House puts it bluntly: “Way too many window-replacement projects come to grief because the opening wasn't measured properly before the order was placed.” That's why our measure technician provides the final numbers for the factory, taking the pressure off you. Your tape measure gets you a price; ours gets you a custom-fitted window.

Measuring special cases

Casement and awning windows

Use the same three-width and three-height method, measuring inside the main frame rather than the moving sash. In the Notes column, jot down which side the hinges are on and which way the window cranks open.

Sliding windows

Measure between the side jambs. If the bottom or top track narrows the opening, record the tightest interior measurement. Note whether one or both panels slide, and which way they move.

Bay and bow windows

Measure the width and height of each panel individually, starting with the center panel. Head outside and snap a photo of the roof or cap above the window, too, so we can see how it ties into your home.

Round tops and special shapes

For arched, half-round, triangular, or trapezoid windows, measure the widest point and the tallest point, then take straight-on photos from inside and outside. Our team will work out the angles and curves from there. Keep in mind that special shapes and specialty paint colors have a lead time of at least 8 weeks, compared to 4 to 6 weeks for standard windows.

Older homes and historic districts

If your home sits in a historic district, your local board might have rules on which window styles, materials, or grid patterns you can use. Photos of your current windows and exterior help us spot those requirements early. If you aren't sure whether your neighborhood has restrictions, that's okay too! Just mention it during your virtual consultation, and we'll help you figure out what to ask your local review board.

Frequently asked questions

Do you measure width or height first?

Width first, then height. Measure the width in three places (top, middle, bottom), then the height in three places (left, center, right), and write down the smallest of each as width x height. Every manufacturer and installer uses this order, and sticking to it keeps a 36 x 60 window from accidentally showing up as a 60 x 36.

How accurate do my measurements need to be for a quote?

To the nearest inch is plenty for a Zen Windows quote. Your price depends on window count, style, glass package, and how your home is built, not on eighths of an inch. Before we place your order, our measure technician comes out to get the exact factory measurements, and your quoted price stays locked in. Don't worry if your numbers are rough; that's okay too!

Why won't someone measure my windows before quoting?

Because we don't need exact measurements to give you a firm, accurate price. Your photos and rough sizes show us the window styles, count, and home construction, which is what actually determines the cost. Skipping the upfront home visit saves you time and keeps salespeople out of your living room. Once you approve the quote, our technician measures every opening before we order a thing, and your price won't change.

How much does window replacement cost?

We price every project individually, so there's no one-size-fits-all number. Your total depends on how many windows you're replacing, the styles, the glass package, and your home's setup. Our cost guide explains how each piece works, and the fastest way to get your real price is to request a free quote using your photos and rough measurements. Homeowners in some areas can also get a quick ballpark figure using our online estimators, like the ones for Denver and Kansas City.

Do you require a deposit, or offer financing?

We never ask for a deposit. You pay nothing when you accept the quote, nothing when we order your windows, and the full balance only after your installation is finished. That's right! Zero down. We also offer several financing options to fit different budgets, and using financing doesn't change our no-money-down policy. Your local advisor can walk you through the plans during your virtual consultation.

How long does installation take?

Window installation usually takes anywhere from a couple of hours to a few days, depending on how many windows we're replacing. Door installation runs from a couple of hours for a standard door to a bit longer for large doors with overhead transoms. Before installation day, the factory needs 4 to 6 weeks to build standard custom windows, or at least 8 weeks for specialty paint colors and custom shapes. An adult needs to be home on installation day, and we'll keep you in the loop with weekly updates from your first call until the job is done.

What if my frame is rotted or out of square?

Snap a photo of the trouble spot and mention it in the Notes column. Severe rot or a crooked frame might mean you need a full-frame replacement (which puts in a brand-new frame) instead of an insert replacement (which slides into your existing frame). Your advisor will walk you through the best fix during your consultation, and our measure technician will double-check it in person. Rest assured, whichever route we take, your new windows are backed by our Double Limited Lifetime Warranty, which covers both parts and labor with no year limit and even transfers to the next homeowner if you sell.

Ready to measure? Here's the next step

Jot down your sizes, snap a few photos, and send both to your local Zen Windows team through our free quote form. We've helped homeowners replace their windows without the hassle since 1998, earning consistently high reviews and plenty of repeat customers along the way. You'll get the same straightforward process whether you're in Denver, Kansas City, or any of our other locations. If you'd rather talk to a person first, [give us a call](tel:(877) 583-0423). There's no pressure either way.

Birdwatching Beyond Your Window: 160+ PNW Birding Resources

Birdwatching Beyond Your Window: 160+ PNW Birding Resources

Many people first discover the joy of birdwatching right at home simply by noticing the birds outside their window. However, this is a hobby that quickly invites you outdoors. The Pacific Northwest is one of the richest birding regions in North America, home to diverse habitats from coastal estuaries and forests to the high desert and gorgeous expansive meadows. Washington and Oregon also offer a huge range of resources to help you connect with local birdlife. From local Audubon chapters and passionate social media groups to birdwatching hot spots, festivals and more, we’ve aimed to compile an extensive list of birding resources to help you on your next birdwatching adventure.

Informational Websites

Avian Knowledge Northwest: A science-based hub providing bird conservation data, interactive tools, and resources for the Pacific Northwest.

Be Bird Wise: Public education campaign promoting respectful and safe birdwatching practices in the Pacific Northwest.

Eastern Washington Birds: Bird photos and information highlighting species of Eastern Washington.

BirdWeb: Seattle Audubon’s online guide to the birds of Washington State.

eBird Oregon: Cornell Lab’s citizen science platform for tracking bird sightings in Oregon.

eBird Washington: Cornell Lab’s citizen science platform for tracking bird sightings in Washington.

Birding Eugene: A birding site dedicated to locations, sightings, and photos around Eugene, Oregon.

Tillamook Birder: Local resource sharing bird sightings, events, and updates from Tillamook County, Oregon.

Klamath Basin Bird News: A news and sightings hub for bird activity in the Klamath Basin.

Travel Oregon – Birding: Official Oregon tourism guide to birdwatching locations and experiences across the state.

Umpqua Birds: Douglas County, Oregon birding information.

WA Bird Guide: Comprehensive guide to Washington birding sites, hotspots, and seasonal tips.

WA Bird Year: Jennifer R. McKeirnan’s quest to photograph every bird in Washington over the course of a year.

BirdDash Oregon: A data tool for exploring bird checklists and sightings in Oregon.

BirdDash Washington: A data tool for exploring bird checklists and sightings in Washington.

Wing & Tail Image Collection: University of Puget Sound’s collection of bird wing and tail pictures.

Accessibility

Audubon Birdability: A crowdsourced birding map detailing accessible birding locations.

AllTrails – Washington ADA Trails: Wheelchair-accessible and ADA-compliant trails throughout Washington.

AllTrails – Oregon ADA Trails: Wheelchair-accessible and ADA-compliant trails throughout Oregon.

TrailLink – Oregon Wheelchair Accessible Trails: Directory of Oregon trails suitable for wheelchairs.

TrailLink – Washington Wheelchair Accessible Trails: Directory of Washington trails suitable for wheelchairs.

Washington Trails Association – ADA Accessible Summer Hikes: A guide to summer hikes in Washington that are fully ADA-accessible for people with mobility limitations.

Travel Oregon – Accessible Trails: An overview of Oregon trails designed for users with mobility or accessibility needs.

Travel Portland – Accessible Trails: A guide to Portland-area trails and outdoor activities that are wheelchair-accessible.

Oregon Science & Industry – Accessible Trails: A list of accessible outdoor trails in Oregon with a focus on inclusive exploration for all abilities.

The Disabled Hiker’s Guide to Western Washington and Oregon: A comprehensive guidebook offering accessible trail routes and practical advice for hikers with disabilities.

Seattle Met – Accessible Paved & Flat Trail Hikes Near Seattle: A guide to easy, paved, and flat trails around Seattle suitable for wheelchairs.

SheBirds – Urban & Accessible Birding: A birding specific guide to accessible trails around Seattle.

Social Media Groups

PNW

Oregon

Washington

Audubon Societies and Other Birding Organizations

Oregon

Washington

Books and Field Guides

Pacific Northwest

Oregon

Washington

Maps and Trails

Oregon

BirdCast Oregon Migration Dashboard – Real-time bird migration data and forecasting for Oregon, tracks nocturnal bird movements and seasonal patterns.

Oregon Coast Birding Trail – A comprehensive guide to 173 birding sites along Oregon's coast with maps, directions, and species lists.

Klamath Basin Birding Trail – A birding paradise featuring over 350 bird species in diverse habitats from marshes to mountain forests.

Oregon Birding Trails – Oregon Birding Maps.

East Cascades Birding Locations – Birding locations and site descriptions from the East Cascades Bird Alliance.

Oregon South Coast Birding– PDF guide to southern Oregon coast birding sites and species information.

Oregon Birding Map – Interactive Google map of Oregon birding locations and hotspots statewide.

Oregon Birding Trails – Directory of Oregon's birding trail network with trail descriptions and access information.

Washington

BirdCast Washington Migration Dashboard – Real-time bird migration tracking and forecasting data for Washington.

Sound to Sage Birding Trail – Bird breeding atlas maps from the Washington Ornithological Society.

Washington Birding Trails – Directory of Washington’s birding trail network with trail descriptions and access information.

Northeast Washington Trails – Trail guide for Ferry, Stevens, and Pend Oreille counties featuring hundreds of miles of trails.

Great Washington State Birding Trail Maps – Seven detailed birding route maps with original artwork identifying the best bird watching locations in Washington.

North Central Washington Audubon Birding Map – Birding locations and maps for north central Washington.

Birds Connect Seattle Maps – Paper maps available for purchase from Birds Connect Seattle.

Washington Bird Maps – Bird species distribution maps.

Bird Watching Hikes in Washington – Washington Trails Association guide to the best hiking trails for bird watching across the state.

Birdwatching Hotspots

Oregon

Oregon Birding Hotspots – Birdwatching Daily – Birding destinations across Oregon.

eBird Oregon Hotspots – Database of top birding locations in Oregon with recent sightings and species data.

Bird Alliance Oregon Portland Metro Area Hotspots – Guide to birding locations in the Portland area.

Washington

Washington Birding Hotspots – Birdwatching Daily – Curated collection of Washington's popular birding areas.

eBird Washington Hotspots – Interactive map of Washington's top birding locations with real-time sighting data.

Olympic Peninsula Birding Destinations – Guide to 300+ bird species across the Olympic Peninsula.

Walla Walla Area Birding Hotspots – Local guide to Eastern Washington birding locations.

Palouse Audubon Local Hotspots – Seasonal birding guides and locations for the Palouse.

Birds of Discovery Park Seattle – Comprehensive checklist and guide to nearly 300 bird species found in Seattle's largest urban park.

James T. Slavin Conservation Area – 628-acre conservation area with wetlands, forests, and grasslands supporting 121 bird species in the Spokane region.

Festivals & Events

Oregon

Washington

Nature Preserves and Observatories

Photography Resources

Stargazing from Your Window

A night sky filled with stars, including constellations, above silhouetted trees and distant mountains.

Stargazing from Your Window

There’s something magical about looking up at the night sky. Even from the comfort of your bedroom window, it’s easy to become engulfed in the vast darkness. Stargazing doesn’t always require expensive equipment or a trip to the countryside. With a little planning and curiosity, you can transform nearly any room with a window into your own personal observatory.

Setting Up Your Space

The first step is creating the right viewing environment. Pick a window that faces the clearest patch of sky, ideally away from tall buildings or streetlights. If you live in a city, choose the highest floor possible. Inside, be sure to turn off any lamps, TVs, or other light sources as these can all cause reflections on glass and reduce visibility.

Let your eyes adjust naturally to the darkness. It usually takes about 15 minutes for your pupils to fully adapt, so resist the urge to check your phone or turn on any lights. You’ll be surprised at how many more stars you can see once your eyes have adjusted.

Best Times to Stargaze

Timing plays a huge role in what you’ll see. Early evenings are perfect for spotting bright planets like Venus or Jupiter before they dip below the horizon. Later at night, the skies often grow darker which can make fainter stars easier to find.

Seasonal differences are important to consider too. Summer stargazing features shorter nights and the spectacular Milky Way core with constellations like Cygnus and Sagittarius, but humid air often reduces visibility. Winter offers longer nights with cool air making it perfect for viewing bright constellations like Orion and Gemini, though the Milky Way's center is hidden below the horizon. Keeping a simple sky calendar helps you anticipate when certain constellations or events will appear.

What You Can See

It’s important to manage expectations. You won’t be seeing galaxies in detail from your bedroom, but there’s still plenty to get excited about. Even with the naked eye, you can track the Moon’s phases, follow bright planets, and identify constellations that ancient cultures have been naming for thousands of years. Each night offers a slightly different sky, making the experience fresh every time.

What You Need 

You don't need expensive gear to begin stargazing effectively. Basic binoculars can reveal lunar craters and Jupiter's moons, while star charts or free mobile apps help identify constellations and track celestial events like moon phases and meteor showers. Simple DIY tools like red cellophane over a flashlight preserve night vision, and cardboard masks or homemade filters cost almost nothing but can be extremely useful. Once you're comfortable with the basics, even a small beginner telescope becomes a worthwhile investment, unlocking views of objects like Saturn's rings 

Binoculars and telescopes transform your stargazing experience and reveal details invisible to the naked eye, from Jupiter's swirling cloud bands and four largest moons to Saturn's rings. Even modest equipment upgrades yield dramatic improvements in what you can observe, making each viewing session a journey to distant worlds.

Stargazing Activities

Stargazing becomes far more rewarding when you actively engage with what you're observing rather than simply looking up. Keeping a sky journal to record nightly observations, from constellation positions to lunar details, creates a personal astronomical record, while sketching planets or crater formations sharpens your observation skills and helps you notice subtle features you might otherwise miss. Simple smartphone photography through binoculars or telescope eyepieces can capture lunar craters and bright planets, which can be a great introduction to astrophotography.

Tracking dynamic changes like the Moon's shifting phases, Jupiter's moons changing positions, or seasonal constellation movements adds a sense of discovery to each session, while exploring cultural stories behind constellation names and setting weekly challenges like spotting new constellations transforms casual viewing into an engaging, long-term pursuit that deepens your connection with the night sky.

External Resources

Apps

Stellarium Mobile – A highly acclaimed planetarium app that offers a realistic night sky experience. It allows users to identify stars, planets, constellations, and satellites by simply pointing their device at the sky. iOS. Android.

SkySafari – Designed for serious astronomy enthusiasts, this app provides a vast database of celestial objects, telescope control, and advanced features like time-lapse simulations. iOS. Android.

Night Sky – An intuitive app that offers real-time sky maps, augmented reality features, and information on celestial events. It's suitable for both beginners and experienced observers.

SkyView Lite – A user-friendly app that uses augmented reality to help users identify stars, planets, and constellations by pointing their device at the sky. iOS. Android.

Star Walk 2 – An interactive app that provides detailed information about celestial objects, including their positions, movements, and upcoming events. iOS. Android.

Sky Tonight – A comprehensive app that offers sky maps, information on celestial events, and tools to help users locate stars and planets. iOS. Android.

GoSkyWatch Planetarium – An elegant app that provides a touchless experience for exploring the night sky, making it ideal for casual skywatchers. iOS. Android.

Star Tracker – A real-time sky map app that helps users identify stars, planets, and constellations with ease.

Star Walk Kids – An astronomy app designed for children, offering interactive sky maps and information about stars and constellations. iOS. Android.

Official Space Agency Star Maps & Tools

NASA SkyMap – Interactive sky map with up-to-date views of stars, planets, and constellations; includes educational guides for beginners.

ESA Star Maps – European Space Agency’s star maps and visualizations; suitable for learning about constellations and space missions.

NASA Night Sky Network – News and guides for sky observation, including celestial events, star charts, and mission updates.

USGS Interactive Planetary Maps – Interactive maps of planets and moons; great for studying planetary geology and surface features.

ALMA Observatory Star Maps – Professional-level maps from radio astronomy observations, primarily focused on deep space objects.

Sky Simulation & Planetarium Software

Stellarium Web – Highly interactive planetarium software showing real-time sky views; useful for planning observations.

Sky & Telescope Interactive Sky Chart – Interactive sky charts that can be customized for date, time, and location.

Your Sky – Customizable planetarium; generates star maps for any date, time, and location on Earth.

In-the-Sky – Real-time sky map showing planets, stars, and satellite positions; suitable for beginner to intermediate observers.

Heavens Above SkyChart – Real-time sky chart tool, especially strong for tracking satellites and ISS passes.

SkyMap Online – Web-based interactive star maps for any location and date; beginner-friendly.

Aladin Sky Atlas – Professional-grade interactive sky atlas for astronomical research and data visualization.

Nine Planets Planetarium Software – List of free and downloadable planetarium software for desktop and mobile use.

Printable Sky Maps

SkyMaps.com Downloads – Monthly star charts available for free download; ideal for beginners and hobbyists.

Bishop Museum Sky Maps – Educational star maps and guides; Hawaii-based museum with kid-friendly resources.

Bell Museum Star Map – Interactive and printable star maps for educational use; supports learning about constellations and celestial events.

Binocular Sky – Sky charts designed specifically for binocular astronomy; shows deep sky objects visible in binoculars.

The Sky Live Planetarium – Live, interactive sky simulation; allows tracking of planets, stars, and minor bodies in real-time.

Books

Stargazing for Beginners – A comprehensive guide that introduces readers to the night sky, covering constellations, planets, and practical tips for observation.

Nightwatch: A Practical Guide to Viewing the Universe – Terence Dickinson's classic offers a detailed introduction to stargazing, including star charts and advice on using telescopes.

Stargazing for Dummies – A beginner-friendly guide that covers the basics of stargazing, including how to observe the night sky and understand celestial objects.

Turn Left at Orion – A practical guide for amateur astronomers, detailing how to observe over 100 celestial objects with a small telescope.

The Backyard Astronomer's Guide – A comprehensive resource that covers equipment, techniques, and sky tours for amateur astronomers.

Night Sky with the Naked Eye – Bob King's guide to observing the night sky without a telescope, focusing on naked-eye astronomy.

The Illustrated Guide to Astronomical Wonders – A detailed guide for serious amateurs, featuring star charts and descriptions of 50 constellations visible from northern latitudes.

Starlight Nights: The Adventures of a Star-Gazer – Leslie Peltier's memoir offers insights into the life of an amateur astronomer and the joys of stargazing.

Usborne Stargazing Book – An interactive guide designed for young readers, introducing them to the wonders of the night sky.

National Geographic Kids Everything Space – A vibrant, photo-rich introduction to space, packed with facts and fun activities.

There's No Place Like Space: All About Our Solar System – A playful exploration of the solar system with Dr. Seuss's signature style.

Resources from NASA

NASA Kids’ Club – Interactive games, activities, and space-themed fun for children. Aimed at sparking curiosity about space exploration and science in younger learners.

NASA Learning Resources for Educators – A hub of teaching tools, lesson plans, and materials designed for teachers to bring space science and STEM into classrooms.

NASA Space Place – Colorful, kid-friendly articles, games, and animations explaining space, Earth science, and technology in simple language.

StarChild – An educational site aimed at younger students, with simple explanations about the solar system, the universe, and space exploration.

Imagine the Universe! – A site for middle and high school students that explores high-energy astronomy topics like black holes, quasars, and supernovae.

NASA STEM Engagement Learning Resources – A wide selection of STEM activities, challenges, and educational opportunities for students and teachers.

NASA Education Materials – Downloadable PDFs, lesson plans, and guides covering a variety of science, math, and technology subjects for different grade levels.

NASA STEM @ Home for K–4 Students – Hands-on activities and projects young children can do at home, from crafts to science experiments, to explore space topics.

NASA Learning Resources for Grades 5–8 – Activities, experiments, and interactive lessons designed for middle school students to dive deeper into STEM and space science.

NASA eClips – A video series that connects real-world NASA missions with STEM topics taught in school, making science more engaging for students.

NASA’s Universe of Learning – A program that provides multimedia, interactive experiences, and educational materials to help learners explore astrophysics and the universe.

NASA/JPL Photojournal – An extensive archive of high-quality images from NASA’s missions, covering planets, spacecraft, galaxies, and more.

For Kids

Interactive Websites

NASA Kids' Club – Offers games and activities for children pre-K through grade 4, supporting STEM education standards.

OLogy – Explore Mars, stargazing, and asteroid missions through games and hands-on projects. iOS app.

National Geographic Kids – Passport to Space – Journey beyond Earth with facts, photos, books, and games about space.

Science Kids – Explore the universe with astronomy for kids and enjoy free games, fun facts, cool quizzes, amazing videos, and science fair projects.

Planets For Kids – Find lots of information about our solar system with questions, answers, and games.

NASA Kids' Clubhouse – A collection of fun and exciting NASA games for students in Kindergarten through fourth grade.

NeoK12 – Solar System for Kids – Interactive quizzes, games, puzzles and videos.

Printable Activities & Guides

Astronomy for Kids – Great astronomy resources for kids, including a selection of fun activity sheets.

A Kid's Guide to Stargazing – Learn how to identify stars, planets, and constellations in the night sky, then record your sightings in a stellar sky journal.

NASA Space Place – Printable Resources – A fun and educational site offering printable posters, bookmarks, “Make a Planet Mask!” crafts, Space Valentines, and activity books.

Free Astronomy Worksheets & Printables – Hundreds of free, downloadable worksheets and activity packets for teaching astronomy.

Vanderbilt Museum – A curated collection of free printable worksheets developed by astronomy educators.

Birdwatching From Your Window

A small bird with a bright orange chest perched on a branch, surrounded by a blurred green background.

Birdwatching From Your Window

Your window can be a stage for one of nature’s most captivating shows! Birdwatching is a simple hobby that offers something valuable for everyone regardless of age or physical ability. 

For children, it can spark an early love of science and inspire a lifelong sense of wonder and connection to the natural world. Adults may discover a peaceful break from screens and their hectic routines, and seniors or those with limited mobility can find joy in the daily visits. 

Additionally, a 2024 study found that participants who engaged in just five 30-minute birdwatching sessions showed measurable improvements in mental health!

Birdwatching is a hobby that asks for little but offers so much in return. From the simple thrill of identifying a new species to the comfort of recognizing the same birds returning each day, birdwatching offers endless moments of joy that can help brighten anyone’s day.

Creating the Perfect Indoor Birdwatching Spot 

To enjoy birdwatching from indoors, all you really need is a window with a clear view of trees, bushes, or even a powerline on a quiet street. But with a few small tweaks you can make your birdwatching setup even more enjoyable. 

Clean the glass, especially if you plan to take pictures and consider removing screens if it’s safe to do so. Set up a comfortable chair, cushion, or window seat where you can sit for a few minutes at a time. 

If you’re watching with kids, make sure they can reach the window or have a cozy area to join you nearby. Keep a notebook, bird guide, and binoculars within arm’s reach so you can easily make notes, look up unfamiliar birds, or get a closer view without interrupting the moment.

Overcoming Window Birdwatching Challenges

While birdwatching from your window offers many advantages, it does come with some unique challenges. Reflections on the glass can make it difficult to see clearly, especially during certain times of day when sunlight creates glare. Birds may be partially obscured by branches, feeders, or other objects, making viewing or identification tricky. Window screens can blur details, and you're limited to whatever birds happen to visit you because you can't follow any that fly out of sight. Weather conditions like rain or fog can reduce visibility, and indoor lighting might create reflections that interfere with your view. 

Additionally, you can't get closer to observe fine details or behaviors that might be visible during a nature walk. However, these limitations often make window birding more like a puzzle to solve, encouraging patience and creative problem-solving that can actually enhance your observation skills over time.

Bringing the Birds to You 

You can invite birds to visit regularly by making your outdoor space more welcoming. A simple window-mounted bird feeder brings birds right up to the glass, providing close-up views that are especially exciting for kids. Try different foods to attract various species: black-oil sunflower seeds for cardinals and finches, suet cakes for woodpeckers and nuthatches, or sugar water for hummingbirds (never dyed red, as artificial coloring can be harmful). A small dish of clean water can attract visitors looking for a drink or bath. 

Over time, birds will visit consistently, sometimes even at the same time each day, turning your window into a live nature documentary unfolding right outside your home!

Who's That Bird? Learning to Identify Your Visitors

One of the most rewarding parts of birdwatching is figuring out who's who. It can be overwhelming trying to learn so much all at once, so start by watching just a few regular visitors and learning their names before trying to identify every species you see. Use printed guides or free apps like Merlin Bird ID, which let you enter traits or snap a photo for identification. Apps like BirdNET can identify birds by sound. Don't worry if identification feels challenging at first because even experienced birders often have trouble correctly identifying birds!

Birdwatching Fun for Curious Kids 

Children are natural observers, and birdwatching taps into their curiosity about the world around them. Here are some ways to make window birdwatching engaging and educational for young nature enthusiasts:

  • Create a personalized bird journal where kids can draw pictures of visitors, write down interesting colors and behaviors, or invent creative names and backstories for their favorite birds before learning the official species names
  • Make it a game with simple tracking tools like printable checklists, bingo cards with common backyard birds, or a “first sighting” calendar where kids can mark the date they spotted each new species
  • Hands-on projects that bring birds closer such as building bird feeders from pine cones and peanut butter, creating paper plate bird masks, or practicing bird calls and songs they hear outside their window
  • Rainy day bird activities including bird-themed coloring books, nature documentaries like “Winged Migration,” bird identification card games, or online virtual bird cams from around the world
  • Keep sessions short and flexible since even 5-10 minutes of focused watching can spark curiosity, and letting kids set their own pace prevents boredom while building a foundation for lifelong appreciation of wildlife and nature

External resources

Apps

Bird Identification & Field Guides

  • All About Birds: An online encyclopedia with detailed species accounts, photos, calls, and maps.
  • BirdAcademy: An educational platform providing online courses and resources to enhance birdwatching skills and knowledge.
  • Audubon Guide to North American Birds: Explore more than 800 North American bird species, learn about their lives and habitats, and how climate change is impacting their ability to survive.
  • RSPB's Birds A-Z: online resource that offers a comprehensive, alphabetized list of over 260 bird species found in the UK

Birdwatching Information and How-To Guides

Birdwatching Communities & Clubs

  • Celebrate Urban Birds: Citizen science project encouraging bird observation in cities and neighborhoods.
  • American Birding Association Clubs & Organizations: Directory of birdwatching clubs across North America.
  • eBird: A global database where birders record and share sightings, with real-time maps of bird activity.
  • Project FeederWatch: a citizen-science project where people record birds from their yards or windows each winter to help track population and distribution trends across North America.
  • Audubon Near You: Plan a visit to an Audubon Center or Sanctuary, or connect with your local Audubon chapter to explore the birds in your community.

Kids’ Educational Resources

  • Bird Facts: Simple facts, coloring sheets, and quizzes about birds for young learners.
  • Bird Bingo: Printable bingo cards to make birdwatching fun for children.
  • Bird Word Games: Vocabulary and games for English learners with a bird theme.
  • Bird Worksheets: Printable educational materials for kids learning about birds.
  • Bird Facts: Free teacher-created bird worksheets and activities.
  • Bird Coloring Pages: Printable coloring sheets of birds for kids.

DIY Crafts & Activities

Oops, Post Not Found!

Uh Oh. Something is missing. Try double checking things.

This is the error message in the parts/content-missing.php template.