
How to Measure for Replacement Windows: Your 3-Step Guide
How do you measure for replacement windows? Measure width and height in three places, keep the smallest, note the style. Printable table, photo checklist, and common mistakes.
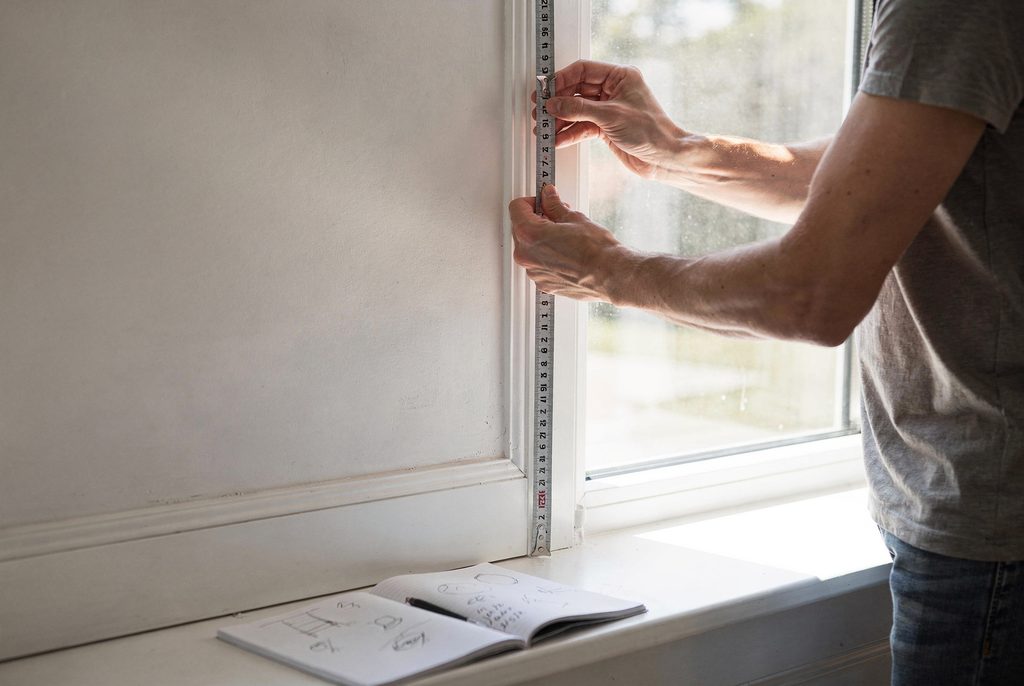
How do you measure for replacement windows? Measure the width of the opening in three places (top, middle, bottom) from the inside face of one side jamb to the other. Then measure the height in three places (left, center, right) from the top of the sill to the underside of the head jamb. Write down the smallest width and the smallest height, in that order, and note the window style (double-hung, casement, sliding, picture, and so on). That's the whole method, and the three steps below walk you through it window by window.
One thing before you grab a tape measure: if you're measuring to get a replacement window quote from us, rough numbers to the nearest inch are plenty. Our online quote process is built around your photos, window count, styles, and approximate sizes so you can get clear pricing from home without sitting through an in-house sales pitch. Rest assured, a Zen Windows measure technician takes the exact measurements before we order anything. Don't worry about being perfect. Being close is enough to get an accurate price.
What you'll need
- A steel tape measure. It stays stiff and straight across a wide opening, which a cloth or flexible tape won't.
- Pencil and paper, or your phone's notes app. This Old House suggests starting a fresh page per room with each window labeled by location and type, like “Kitchen, left double-hung.”
- A step stool or ladder for tall windows and anything above a kitchen counter.
- A helper if you have large picture windows or sliders. One person holds the tape hook while the other reads the number.
- Your phone camera for the photo checklist further down.
You don't need a level, an angle finder, or a calculator to get a quote.
Step 1: Measure the width
Stand inside your house and open the window if it opens. Hook your tape on the inside face of one side jamb (the vertical boards that form the sides of the main frame) and run it straight across to the inside face of the opposite jamb. Take the reading at three spots:
- Near the top, just under the head jamb.
- At the middle, roughly where the two sashes meet on a double-hung window.
- Near the bottom, just above the sill.
Circle the smallest of the three. That's your width. Old frames are rarely perfectly parallel, and the narrowest point is the gap your new window actually has to slide into. That's why Andersen's measuring guide and nearly every manufacturer worksheet tell you to use the smallest number.
Always measure wood to wood (or vinyl to vinyl). Don't hook the tape on the interior decorative trim, the thin parting stop, the weatherstripping, or the lock hardware. Marvin's insert window instructions are clear on this: width goes from main frame surface to main frame surface, never from stops or hardware. Measuring to a stop or trim adds that extra thickness to your number and leads to an oversized window that won't fit the opening.
Step 2: Measure the height
Now run the tape vertically. Start at the top of the sill (the sloped board at the bottom of the frame that the window sash rests on when closed) and measure up to the underside of the top head jamb. Don't measure from the flat shelf sticking out into your room. That's the stool, which is interior trim rather than part of the window frame. Take three readings:
- Left side, close to the jamb.
- Center of the opening.
- Right side, close to the jamb.
Circle the smallest number. If your sill is sloped, hook your tape at the highest point of the slope where the inside of the window meets it, and measure straight up from there.
Step 3: Note the style, then write it as width by height
Next to each measurement, write down the window style: double-hung (two sashes that slide up and down), sliding (glides side to side), casement (cranks outward for full top-to-bottom ventilation), picture (a fixed pane for clear views and daylight), awning (hinged at the top to let air in even during a light rain), bay, bow, or a special shape. Matching the style to how you use each room helps us build an accurate quote, since style is one of the main factors that drives price alongside window count, glass package, and how your home is built.
Next, write the final dimensions with width first, height second. A window that's 35 inches wide and 59 inches tall is written 35 x 59, never 59 x 35. Manufacturer order forms always put width before height, and replacement window measurements follow this order across the industry, so sticking to it prevents costly mix-ups. If you only remember one rule from this guide, make it this one.
Optional checks: depth and square
You don't need these two measurements for a quote, and if you skip them, that's okay too! They're simply helpful if you want to see whether your existing frames can take a standard pocket (insert) replacement. Pocket replacements slide right into your current frame without tearing up your interior trim or exterior siding.
- Depth. With the window open, measure the flat surface of the sill between the inside stop and the outside stop. This Old House notes that a replacement window needs at least 3 1/4 inches of depth to sit securely in the frame. Most homes have plenty of room, and shallow frames usually only show up in modular or mobile homes.
- Square. Measure diagonally from corner to corner both ways. Andersen's rule is that diagonals within 1/8 inch of each other mean the opening is square, while This Old House allows up to 1/4 inch. If a frame is badly out of square or has wood rot, you'll likely need a full-frame replacement instead of an insert. No worries! We can help you sort that out during your virtual consultation rather than leaving you to figure it out yourself.
Printable measurement table for the whole house
Many homeowners replace windows across the whole house at once, and keeping your numbers on a single sheet prevents mix-ups from room to room. Print your own table or set up a quick spreadsheet with a row for each window. Make sure you measure every window separately, even the ones that look identical side by side. House walls settle and shift over time, so two matching windows in the same room often have slightly different measurements.
| Room / location | Style | Width: top | Width: middle | Width: bottom | Height: left | Height: center | Height: right | Final (W x H) | Notes |
|---|---|---|---|---|---|---|---|---|---|
| Example: Kitchen, over sink | Double-hung | 35 1/4 | 35 1/8 | 35 1/4 | 59 1/2 | 59 3/8 | 59 1/2 | 35 1/8 x 59 3/8 | Faces west, condensation between panes |
Use the Notes column to share helpful details about each window: which direction it faces, whether it sticks or won't lock, whether the glass is foggy, or if it's in a bedroom or bathroom (so we can plan for fire-escape rules or privacy glass). Also mention if you have a busy street or highway outside, since we offer glass packages that help quiet down outside noise. A quick floor plan sketch with each window numbered helps us match everything up, too.
Photo checklist for a Zen Windows quote
Photos tell our local advisors things a tape measure can't: how your home is built, what the exterior finish looks like, how high the windows sit, and whether there's anything unusual about the trim or the opening. Along with your window count, styles, and rough sizes, we use these photos to price your project accurately without setting foot in your home. Here's what to shoot:
- Each window from inside, standing back far enough to show the whole unit and the trim around it, with blinds and curtains open.
- Each window from outside, or at least each side of the house. We look at siding, brick or stucco, exterior trim, and story height. A second-story window on a steep lot takes a different setup to install than one at ground level.
- A wide shot of each side of the house (front, back, both sides) so we can count the windows and match them to your table.
- Any problem areas: rot on the sill, peeling paint, fogged glass, gaps, or water stains on the drywall below.
- Anything unusual: a bay or bow window, an arched or round top, two windows joined together in one frame, a kitchen garden window, or a window that's tough to reach from outside.
- Doors, if you're replacing those too. Snap photos of your entry, patio, or sliding doors both open and closed, inside and out.
Daylight shots work best. Phone photos are totally fine; nobody's grading your camera work. Upload your photos through our quote form and paste your table into the project details field. From there, your local team will set up a 45-to-60-minute virtual consultation where you'll see the products, walk through your options, and get your questions answered. There's no home visit, no obligation, and no deposit.
Common measuring mistakes
- Measuring the trim instead of the frame. Trim and stop moldings add extra inches to your reading. Hook your tape measure right against the inside of the jamb (the main frame).
- Taking one reading instead of three. Older frames settle and shift. A window frame might be narrower at the bottom than at the top, and your new window has to fit through the narrowest spot.
- Using the largest number. Always record the smallest width and the smallest height. An installer can easily shim and seal a window with a tiny bit of wiggle room, but a window that's too big simply won't fit.
- Writing height before width. Window pros and factories always list width x height. Label your columns clearly so nothing gets flipped.
- Rounding up. If you round your numbers at all, round down to the nearest 1/8 inch. For a Zen Windows quote, rounding to the nearest inch is plenty.
- Starting the height from the interior ledge. That flat wooden shelf inside your room is the stool. Push your tape past it to the sloped outer frame piece, which is the true sill, and measure from there.
- Assuming look-alike windows are the exact same size. Measure every single opening. House settling, past repairs, and original builder quirks all add up.
- Measuring from outside. Every reliable guide, from Andersen's to This Old House's, has you measure from inside the home, right between the jambs.
- Measuring a bay or bow as one big opening. Each section is actually its own window. Measure the center panel first, then each side panel, recording the width and height for each one.
- Subtracting space for wiggle room yourself. Manufacturers automatically build installation clearance into insert windows (Marvin, for example, makes its inserts 3/8 inch narrower and 1/4 inch shorter than the opening size you give them). Write down the actual opening size and let the pros handle the deductions.
Why rough measurements are enough for a Zen Windows quote
Homeowners sometimes ask why we don't send someone out to measure before giving a quote. The honest answer is that you don't need exact measurements to get an accurate price. Window replacement costs come down to how many windows you need, the styles, the glass package, and how your home is built. Your photos and rough sizes give us all of that. We don't need to sit in your living room to give you a real number, and you don't have to give up an afternoon for a sales pitch.
Once you accept your quote, we schedule a visit from a Zen Windows measure technician at a time that works for you. The technician measures every window and door in your project down to the fraction of an inch and takes detailed photos so the factory builds your replacements to fit right. Rest assured, your quoted price won't change after this visit. That's right! The number on your quote is the exact number you pay, and you don't pay a dime until installation is complete. It's a quick measuring appointment, not a second sales pitch, and it's the only visit we need before placing your order. Our process page walks through each step, and our window replacement cost guide breaks down the pricing factors in more detail.
Exact factory numbers matter because custom replacement windows are made to order. Norm Abram of This Old House puts it bluntly: “Way too many window-replacement projects come to grief because the opening wasn't measured properly before the order was placed.” That's why our measure technician provides the final numbers for the factory, taking the pressure off you. Your tape measure gets you a price; ours gets you a custom-fitted window.
Measuring special cases
Casement and awning windows
Use the same three-width and three-height method, measuring inside the main frame rather than the moving sash. In the Notes column, jot down which side the hinges are on and which way the window cranks open.
Sliding windows
Measure between the side jambs. If the bottom or top track narrows the opening, record the tightest interior measurement. Note whether one or both panels slide, and which way they move.
Bay and bow windows
Measure the width and height of each panel individually, starting with the center panel. Head outside and snap a photo of the roof or cap above the window, too, so we can see how it ties into your home.
Round tops and special shapes
For arched, half-round, triangular, or trapezoid windows, measure the widest point and the tallest point, then take straight-on photos from inside and outside. Our team will work out the angles and curves from there. Keep in mind that special shapes and specialty paint colors have a lead time of at least 8 weeks, compared to 4 to 6 weeks for standard windows.
Older homes and historic districts
If your home sits in a historic district, your local board might have rules on which window styles, materials, or grid patterns you can use. Photos of your current windows and exterior help us spot those requirements early. If you aren't sure whether your neighborhood has restrictions, that's okay too! Just mention it during your virtual consultation, and we'll help you figure out what to ask your local review board.
Frequently asked questions
Do you measure width or height first?
Width first, then height. Measure the width in three places (top, middle, bottom), then the height in three places (left, center, right), and write down the smallest of each as width x height. Every manufacturer and installer uses this order, and sticking to it keeps a 36 x 60 window from accidentally showing up as a 60 x 36.
How accurate do my measurements need to be for a quote?
To the nearest inch is plenty for a Zen Windows quote. Your price depends on window count, style, glass package, and how your home is built, not on eighths of an inch. Before we place your order, our measure technician comes out to get the exact factory measurements, and your quoted price stays locked in. Don't worry if your numbers are rough; that's okay too!
Why won't someone measure my windows before quoting?
Because we don't need exact measurements to give you a firm, accurate price. Your photos and rough sizes show us the window styles, count, and home construction, which is what actually determines the cost. Skipping the upfront home visit saves you time and keeps salespeople out of your living room. Once you approve the quote, our technician measures every opening before we order a thing, and your price won't change.
How much does window replacement cost?
We price every project individually, so there's no one-size-fits-all number. Your total depends on how many windows you're replacing, the styles, the glass package, and your home's setup. Our cost guide explains how each piece works, and the fastest way to get your real price is to request a free quote using your photos and rough measurements. Homeowners in some areas can also get a quick ballpark figure using our online estimators, like the ones for Denver and Kansas City.
Do you require a deposit, or offer financing?
We never ask for a deposit. You pay nothing when you accept the quote, nothing when we order your windows, and the full balance only after your installation is finished. That's right! Zero down. We also offer several financing options to fit different budgets, and using financing doesn't change our no-money-down policy. Your local advisor can walk you through the plans during your virtual consultation.
How long does installation take?
Window installation usually takes anywhere from a couple of hours to a few days, depending on how many windows we're replacing. Door installation runs from a couple of hours for a standard door to a bit longer for large doors with overhead transoms. Before installation day, the factory needs 4 to 6 weeks to build standard custom windows, or at least 8 weeks for specialty paint colors and custom shapes. An adult needs to be home on installation day, and we'll keep you in the loop with weekly updates from your first call until the job is done.
What if my frame is rotted or out of square?
Snap a photo of the trouble spot and mention it in the Notes column. Severe rot or a crooked frame might mean you need a full-frame replacement (which puts in a brand-new frame) instead of an insert replacement (which slides into your existing frame). Your advisor will walk you through the best fix during your consultation, and our measure technician will double-check it in person. Rest assured, whichever route we take, your new windows are backed by our Double Limited Lifetime Warranty, which covers both parts and labor with no year limit and even transfers to the next homeowner if you sell.
Ready to measure? Here's the next step
Jot down your sizes, snap a few photos, and send both to your local Zen Windows team through our free quote form. We've helped homeowners replace their windows without the hassle since 1998, earning consistently high reviews and plenty of repeat customers along the way. You'll get the same straightforward process whether you're in Denver, Kansas City, or any of our other locations. If you'd rather talk to a person first, [give us a call](tel:(877) 583-0423). There's no pressure either way.